logotype
  • Home
  • Home
    • Homepage 1
    • Homepage 2
    • Homepage 3
    • Homepage 4
    • Homepage 5
    • Homepage 6
    • Homepage 7
    homepage 1

    Main home(01)

    homepage 2

    Creative agency(02)

    homepage 3

    Minimal agency(03)

    homepage 4

    Digital company(04)

    homepage 5

    Design company(05)

    homepage 6

    Minimal studio(06)

    homepage 7

    Portfolio minimal(07)

    homepage coming soon2

    In development(08)

  • About
  • Services
    • Website Design And Development
    • MOBILE APPS
    • MANAGEMENTS AND ASSIST
  • Blog
  • Contact
  • Pages
    • About us
    • Our team
    • Services
    • History
    • Philosophy
    • FAQ’s
    • Typography
    • Elements
    • Page 404
    • Coming soon
    • Mega menu page
  • Blog
    • Blog listing
    • Blog grid
      • 2 columns
      • 2 col + sidebar
      • 3 columns
      • 4 col wide
    • Masonry grid
      • 2 columns
      • 2 col + sidebar
      • 3 columns
      • 4 col wide
    • Blog singles
      • Standard
      • Video
      • Quote
      • Gallery
      • Link
      • Audio
    • Single layouts
      • Overlay image
      • Title first
      • Image first
  • Portfolio
    • Grid
      • 2 columns
      • 3 columns
      • 4 col wide
      • 5 col wide
    • Masonry
      • Grid 1
      • Grid 2
      • Grid 3
    • Gallery
    • Single
  • Shop
    • Cart
    • Checkout
    • My account
    • Wishlist
    Shop
    • Products Grid
    • Single Product
    • Cart
    • Checkout
    • Wishlist
    • Login - Register
    • Help Center
  • Contacts
    Contacts
    address:
    27 Division St, NY 10002 USA
    email:
    burido@mail.com
    phone:
    +1 800 123 456 78
    X-twitterFacebook-fInstagram
    Get in Touch

    Your email address will not be published. Required fields are marked *

Get in Touch
web Tag
HomewebPage 2

Tag: web

PHP 7
Blog
December 7, 2018By Amine G

What’s New in PHP 7.3 in 30 Seconds in Diffs

No time but eager to hear PHP news? PHP 7.3 is out in December 2018 and it brings 173 changes. Which are the most useful ones?

From features that might be the most interesting to those lesser ones, that anybody will rarely use.

1. Comma After the Last Argument

Do you know this?

 $array = [
     1,
+    2,
 ];

We’ll be able to do this:

 $this->someFunction(
     $arg,
+    $arg2,
 );

But still not this:

 function someFunction(
     $arg,
+    $arg2,
 ) {}

Thanks Jacob for pointing this difference out.

25 seconds to go…

2. First and Last Array Key

  • array_key_first
 $items = [
     1 => 'a',
     2 => 'b',
 ];

-reset($items);
-$firstKey = key($items);
+$firstKey = array_key_first($items);
 var_dump($firstKey); // 1
  • array_key_last
 $items = [
     1 => 'a',
     2 => 'b',
 ];

-end($items);
-$lastKey = key($items);
+$lastKey = array_key_last($items);
 var_dump($lastKey); // 2

These will be handy in coding standard tools.

Still 15 seconds…

3. Countable for Risky Variables

I don’t think having a variable of 2 forms is a good idea:

<?php

$items = null; // same as "private $items;" in a class

echo sprintf('There is %d items', count($items));
// error Warning: count(): Parameter must be an array or an object that implements Countable

But in case of that smelly (3rd party) code, there is a help:

  • is_countable
 $items = null;

+if (is_countable($items)) {
-echo sprintf('There is %d items', count($items));
+     echo sprintf('There is %d items', count($items));
+}

Only 5 seconds, hurry!

4. Safer JSON Parsing

-json_encode($data);
+json_encode($data, JSON_THROW_ON_ERROR);
-json_decode($json);
+json_decode($json, null, null, JSON_THROW_ON_ERROR);

So you’ll be able to do:

try {
    return json_decode($json, null, null, JSON_THROW_ON_ERROR);
} catch (JsonException $exception) {
    // ...
}

I’ve used similar technique for years thanks to Nette\Utils and I’ve never complained:

<?php

try {
    return Nette\Utils\Json::encode($value);
} catch (Nette\Utils\JsonException $exception) {
    // ...
}

…0, you made it! Congrats, now get back to pwning the world!

Did I miss a feature you plan to use from day 1 of your PHP 7.3? I might too, drop it in the comments!

Read More
web secure
Blog
November 22, 2018By Amine G

Fundamentals Of Web Applications Security .

Over the past ten years, we have heard much about the security of web applications, and the threats that can come from using them. For better or worse, modern businesses have become increasingly dependent on the use of web applications developed agile; from complex infrastructure systems to IoT devices.

Attacks on web applications provide intruders with ample opportunities such as:

-Access to a company’s internal resources and sensitive information;

-The opportunity to disrupt the functioning of an application or bypass business logic;

-Financial gains for the attacker, and losses, both financial and reputational, for the owner of web applications.

Users of web applications are at risk, because if an attack is successful, the intruder can steal credentials, perform actions on websites on behalf of users, and infect a system with malware. To avoid such situations it is important to take the help of a solution based on premise identity and access management solution that can easily manage your organization and mitigate any security threats.

In this article, we’ll talk about the types of attacks, the ways threat actors can damage your system, and how you can protect your company’s essential data.

Types of Attacks

There are different types of attacks. They differ depending on the sophistication of the way malefactors have chosen to steal sensitive data. The most popular attacks are:

1.Implementing SQL statements

2.Running OS commands

3.Path Traversal

4.Сross-site scripting

5.Denial of service

6.Сonnecting local files

7.Implementing XML external entities

8.Downloading random files

9.Cross-site request forgery

One of the most simple ways to wangle desired data from a web app is to use brute force attacks. This approach is reliant on a user’s laziness and carelessness, which are unfortunately traits that many of us share. With Google Cloud platform vulnerability management you can avoid attacks.

As we all know, to access an app, we need to create a username and password. However, it is very seldom that one thinks hard about this task. In most cases, people enter a password connected to their email, name, surname, date of birth, etc. It becomes even worse when the employee writes the password on a post-it note and leaves it on their computer screen.

As the goal of the attack is to find a valid username and password, it’s not as difficult as we would assume for intruders to spend a couple of hours scrolling Instagram profiles of a particular organization in search of a careless photo that reveals login details.

Ways to Implement a Brute Force Attack

3 Don’ts If You Want to Avoid an Attack

DON’T BLOCK THE IP

After finding that there has been an attack, most likely you will want to reactively block the intruder’s IP address. However, we would advise you to refrain from such impulsive actions because:

-the intruder can easily overcome this by dynamically changing the IP address

-blocking a public IP may cut off other users of the same address

DON’T BLOCK THE USER

Another bad idea is to block those users that have failed to log in multiple times. This is a dangerous approach. A potential intruder may try many valid usernames, and you’ll end up blocking each and every one of these people. Most likely this will annoy users and deter them from using your app. A lighter version of this solution is to lock an account temporarily, with a response such as “You entered your password incorrectly a few times in a row. Try again in 30 seconds.”

DON’T USE CAPTCHA

Of course it is great to receive confirmation from CAPTCHA that you’re not a robot, but unfortunately this method is inconvenient. It lacks usability in many cases, and is (unexpectedly) vulnerable to attacks. In applications that prioritize user friendliness, CAPTCHA should be considered a last resort.

How to Protect Yourself from a Brute Force Attack

Step #1. DEFINE WHAT YOU PROTECT

Analyze what kind of resources/values should be defended above all else. Money? Sensitive data? Reputation? A hacked homepage can result in the loss of all three of these and should be obviously avoided at all costs.

Step #2. DETECT THE ATTACK

To eradicate a brute force attack, you need first to detect it. For this, you need to use tools for monitoring the network traffic of your web app. Pay attention to metrics and logs. The HTTP metrics should be detailed enough to determine the URL and method of each incoming request, status, and the number of produced responses. Logs will provide more detailed information about each request that cannot always be collected and presented as metrics.

Step #3. ASK AN ADDITIONAL SECRET QUESTION

Secret questions can be beneficial if you want to detect attackers without bothering the regular users of your web app. As you know, the secret question and corresponding answer are configured in a user’s profile. If a user has failed to login a few times, give them the option of answering their secret question. Make sure to also ask these questions for invalid logins, so the attacker won’t know if an account really exists or not.

Step #4. INTRODUCE LATENCY/ DELAY

During a brute force attack an intruder will make attempts with many passwords. Implementing a delay between failed login attempts can dramatically decelerate the whole process, making it too time-consuming for an attacker. The additional latency won’t bother real users.

Step #5. TRICK BRUTE FORCE TOOLS

In a brute force attack, some penetration testing tools may be used, like THC-Hydra. These programs send requests with a User-Agent header set to a default value. This is a tell-tale sign of an attack tool.

By randomly returning the 200 status responses for requests with such header, an application can fool the attacker, who will no longer be able to distinguish between correct and failed attempts. It’ll work on amateur hackers who don’t know how to modify Hydra’s request headers. Note this isn’t a fully secure solution as request headers can’t always be relied on.

Conclusion

Many of the attacks committed nowadays are not particularly ingenious and can be easily avoided or detected by following the aforementioned pieces of advice. Nevertheless, we can’t get complacent. The technical expertise that modern cybercriminals possess make it possible to carry out attacks with a high level of complexity, including through a series of actions that occur at different times and at first glance do not seem related.

Read More
webcomponents-peek
Blog
November 18, 2018By Amine G

The Power of Web Components

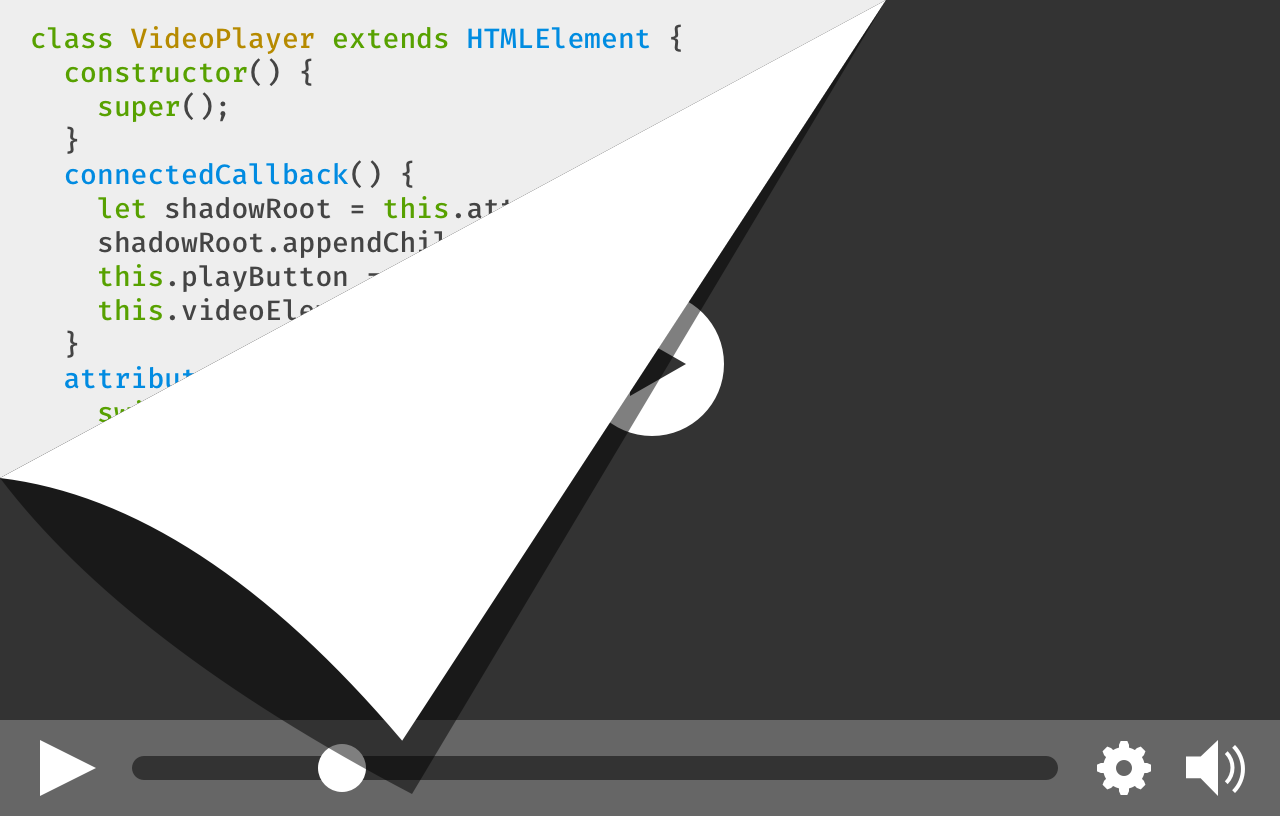
A video player with a corner folded over, revealing the code that powers it.

Background

Ever since the first animated DHTML cursor trails and “Site of the Week” badges graced the web, re-usable code has been a temptation for web developers. And ever since those heady days, integrating third-party UI into your site has been, well, a semi-brittle headache.

Using other people’s clever code has required buckets of boilerplate JavaScript or CSS conflicts involving the dreaded !important. Things are a bit better in the world of React and other modern frameworks, but it’s a bit of a tall order to require the overhead of a full framework just to re-use a widget. HTML5 introduced a few new elements like <video> and <input type="date">, which added some much-needed common UI widgets to the web platform. But adding new standard elements for every sufficiently common web UI pattern isn’t a sustainable option.

In response, a handful of web standards were drafted. Each standard has some independent utility, but when used together, they enable something that was previously impossible to do natively, and tremendously difficult to fake: the capability to create user-defined HTML elements that can go in all the same places as traditional HTML. These elements can even hide their inner complexity from the site where they are used, much like a rich form control or video player.

The standards evolve

As a group, the standards are known as Web Components. In the year 2018 it’s easy to think of Web Components as old news. Indeed, early versions of the standards have been around in one form or another in Chrome since 2014, and polyfills have been clumsily filling the gaps in other browsers.

After some quality time in the standards committees, the Web Components standards were refined from their early form, now called version 0, to a more mature version 1 that is seeing implementation across all the major browsers. Firefox 63 added support for two of the tent pole standards, Custom Elements and Shadow DOM, so I figured it’s time to take a closer look at how you can play HTML inventor!

Given that Web Components have been around for a while, there are lots of other resources available. This article is meant as a primer, introducing a range of new capabilities and resources. If you’d like to go deeper (and you definitely should), you’d do well to read more about Web Components on MDN Web Docs and the Google Developers site.

Defining your own working HTML elements requires new powers the browser didn’t previously give developers. I’ll be calling out these previously-impossible bits in each section, as well as what other newer web technologies they draw upon.

The <template> element: a refresher

This first element isn’t quite as new as the others, as the need it addresses predates the Web Components effort. Sometimes you just need to store some HTML. Maybe it’s some markup you’ll need to duplicate multiple times, maybe it’s some UI you don’t need to create quite yet. The <template> element takes HTML and parses it without adding the parsed DOM to the current document.

<template>
  <h1>This won't display!</h1>
  <script>alert("this won't alert!");</script>
</template>

Where does that parsed HTML go, if not to the document? It’s added to a “document fragment”, which is best understood as a thin wrapper that contains a portion of an HTML document. Document fragments dissolve when appended to other DOM, so they’re useful for holding a bunch of elements you want later, in a container you don’t need to keep.

“Well okay, now I have some DOM in a dissolving container, how do I use it when I need it?”

You could simply insert the template’s document fragment into the current document:

let template = document.querySelector('template');
document.body.appendChild(template.content);

This works just fine, except you just dissolved the document fragment! If you run the above code twice you’ll get an error, as the second time template.content is gone. Instead, we want to make a copy of the fragment prior to inserting it:

document.body.appendChild(template.content.cloneNode(true));

The cloneNode method does what it sounds like, and it takes an argument specifying whether to copy just the node itself or include all its children.

The template tag is ideal for any situation where you need to repeat an HTML structure. It particularly comes in handy when defining the inner structure of a component, and thus <template> is inducted into the Web Components club.

New Powers:

  • An element that holds HTML but doesn’t add it to the current document.

Review Topics:

  • Document Fragments
  • Duplicating DOM nodes using cloneNode

Custom Elements

Custom Elements is the poster child for the Web Components standards. It does what it says on the tin – allowing developers to define their own custom HTML elements. Making this possible and pleasant builds fairly heavily on top of ES6’s class syntax, where the v0 syntax was much more cumbersome. If you’re familiar with classes in JavaScript or other languages, you can define classes that inherit from or “extend” other classes:

class MyClass extends BaseClass {
// class definition goes here
}

Well, what if we were to try this?

class MyElement extends HTMLElement {}

Until recently that would have been an error. Browsers didn’t allow the built-in HTMLElement class or its subclasses to be extended. Custom Elements unlocks this restriction.

The browser knows that a <p> tag maps to the HTMLParagraphElement class, but how does it know what tag to map to a custom element class? In addition to extending built-in classes, there’s now a “Custom Element Registry” for declaring this mapping:

customElements.define('my-element', MyElement);

Now every <my-element> on the page is associated with a new instance of MyElement. The constructor for MyElement will be run whenever the browser parses a <my-element> tag.

What’s with that dash in the tag name? Well, the standards bodies want the freedom to create new HTML tags in the future, and that means that developers can’t just go creating an <h7> or <vr> tag. To avoid future conflicts, all custom elements must contain a dash, and standards bodies promise to never make a new HTML tag containing a dash. Collision avoided!

In addition to having your constructor called whenever your custom element is created, there are a number of additional “lifecycle” methods that are called on a custom element at various moments:

  • connectedCallback is called when an element is appended to a document. This can happen more than once, e.g. if the element is moved or removed and re-added.
  • disconnectedCallback is the counterpart to connectedCallback.
  • attributeChangeCallback fires when attributes from a whitelist are modified on the element.

A slightly richer example looks like this:

class GreetingElement extends HTMLElement {
  constructor() {
    super();
    this._name = 'Stranger';
  }
  connectedCallback() {
    this.addEventListener('click', e => alert(`Hello, ${this._name}!`));
  }
  attributeChangedCallback(attrName, oldValue, newValue) {
    if (attrName === 'name') {
      if (newValue) {
        this._name = newValue;
      } else {
        this._name = 'Stranger';
      }
    }
  }
}
GreetingElement.observedAttributes = ['name'];
customElements.define('hey-there', GreetingElement);

Using this on a page will look like the following:

<hey-there>Greeting</hey-there>
<hey-there name="Potch">Personalized Greeting</hey-there>

But what if you want to extend an existing HTML element? You definitely can and should, but using them within markup looks fairly different. Let’s say we want our greeting to be a button:

class GreetingElement extends HTMLButtonElement

We’ll also need to tell the registry we’re extending an existing tag:

customElements.define('hey-there', GreetingElement, { extends: 'button' });

Because we’re extending an existing tag, we actually use the existing tag instead of our custom tag name. We use the new special is attribute to tell the browser what kind of button we’re using:

<button is="hey-there" name="World">Howdy</button>

It may seem a bit clunky at first, but assistive technologies and other scripts wouldn’t know our custom element is a kind of button without this special markup.

From here, all the classic web widget techniques apply. We can set up a bunch of event handlers, add custom styling, and even stamp out an inner structure using <template>. People can use your custom element alongside their own code, via HTML templating, DOM calls, or even new-fangled frameworks, several of which support custom tag names in their virtual DOM implementations. Because the interface is the standard DOM interface, Custom Elements allows for truly portable widgets.

New Powers

  • The ability to extend the built-in ‘HTMLElement’ class and its subclasses
  • A custom element registry, available via customElements.define()
  • Special lifecycle callbacks for detecting element creation, insertion to the DOM, attribute changes, and more.

Review Topics

  • ES6 Classes, particularly subclassing and the extends keyword

Shadow DOM

We’ve made our friendly custom element, we’ve even thrown on some snazzy styling. We want to use it on all our sites, and share the code with others so they can use it on theirs. How do we prevent the nightmare of conflicts when our customized <button> element runs face-first into the CSS of other sites? Shadow DOM provides a solution.

The Shadow DOM standard introduces the concept of a shadow root. Superficially, a shadow root has standard DOM methods, and can be appended to as if it was any other DOM node. Shadow roots shine in that their contents don’t appear to the document that contains their parent node:

// attachShadow creates a shadow root.
let shadow = div.attachShadow({ mode: 'open' });
let inner = document.createElement('b');
inner.appendChild(document.createTextNode('Hiding in the shadows'));
// shadow root supports the normal appendChild method.
shadow.appendChild(inner);
div.querySelector('b'); // empty

In the above example, the <div> “contains” the <b> and the <b> is rendered to the page, but the traditional DOM methods can’t see it. Not only that, but the styles of the containing page can’t see it either. This means that styles outside of a shadow root can’t get in, and styles inside the shadow root don’t leak out. This boundary is not meant to be a security feature, as another script on the page could detect the shadow root’s creation, and if you have a reference to a shadow root, you can query it directly for its contents.

The contents of a shadow root are styled by adding a <style> (or <link>) to the root:

let style = document.createElement('style');
style.innerText = 'b { font-weight: bolder; color: red; }';
shadowRoot.appendChild(style);
let inner = document.createElement('b');
inner.innerHTML = "I'm bolder in the shadows";
shadowRoot.appendChild(inner);

Whew, we could really use a <template> right about now! Either way, the <b> will be affected by the stylesheet in the root, but any outer styles matching a <b> tag will not.

What if a custom element has non-shadow content? We can make them play nicely together using a new special element called <slot>:

<template>
  Hello, <slot></slot>!
</template>

If that template is attached to a shadow root, then the following markup:

<hey-there>World</hey-there>

Will render as:

Hello, World!

This ability to composite shadow roots with non-shadow content allows you to make rich custom elements with complex inner structures that look simple to the outer environment. Slots are more powerful than I’ve shown here, with multiple slots and named slots and special CSS pseudo-classes to target slotted content. You’ll have to read more!

New Powers:

  • A quasi-obscured DOM structure called a “shadow root”
  • DOM APIs for creating and accessing shadow roots
  • Scoped styles within shadow roots
  • New CSS pseudo-classes for working with shadow roots and scoped styles
  • The <slot> element

Putting it all together

Let’s make a fancy button! We’ll be creative and call the element <fancy-button>. What makes it fancy? It will have a custom style, and it will also allow us to supply an icon and make that look snazzy as well. We’d like our button’s styles to stay fancy no matter what site you use them on, so we’re going to encapsulate the styles in a shadow root.

You can see the completed custom element in the interactive example below. Be sure to take a look at both the JS definition of the custom element and the HTML <template> for the style and structure of the element.

Concluion

The standards that make up Web Components are built on the philosophy that by providing multiple low-level capabilities, people will combine them in ways that nobody expected at the time the specs were written. Custom Elements have already been used to make it easier to build VR content on the web, spawned multiple UI toolkits, and much more. Despite the long standardization process, the emerging promise of Web Components puts more power in the hand of creators. Now that the technology is available in browsers, the future of Web Components is in your hands. What will you build?

Read More
  • 1
  • 2